
Classification / tag handling plugin
The screenshots show the German user interface.
Extend the functionality of searchit with plugins to handle specialized tasks.
Classification plugin
The searchit classification plugin brings more structure to your files. With tags assigned automatically during indexing (for example from the keywords generated by the AI) or assigned manually by users, your documents can be classified and thus made easier to search.
Tag handling
To let you mark documents as private or as public for all employees, we introduced “tag handling”. By assigning tags, which can also contain a hierarchy, you can give specific documents several parameters and later search and filter by them. Manually assigned tags are often used in project or event management, in controlling or, for example, to classify image material.
Assigning tags
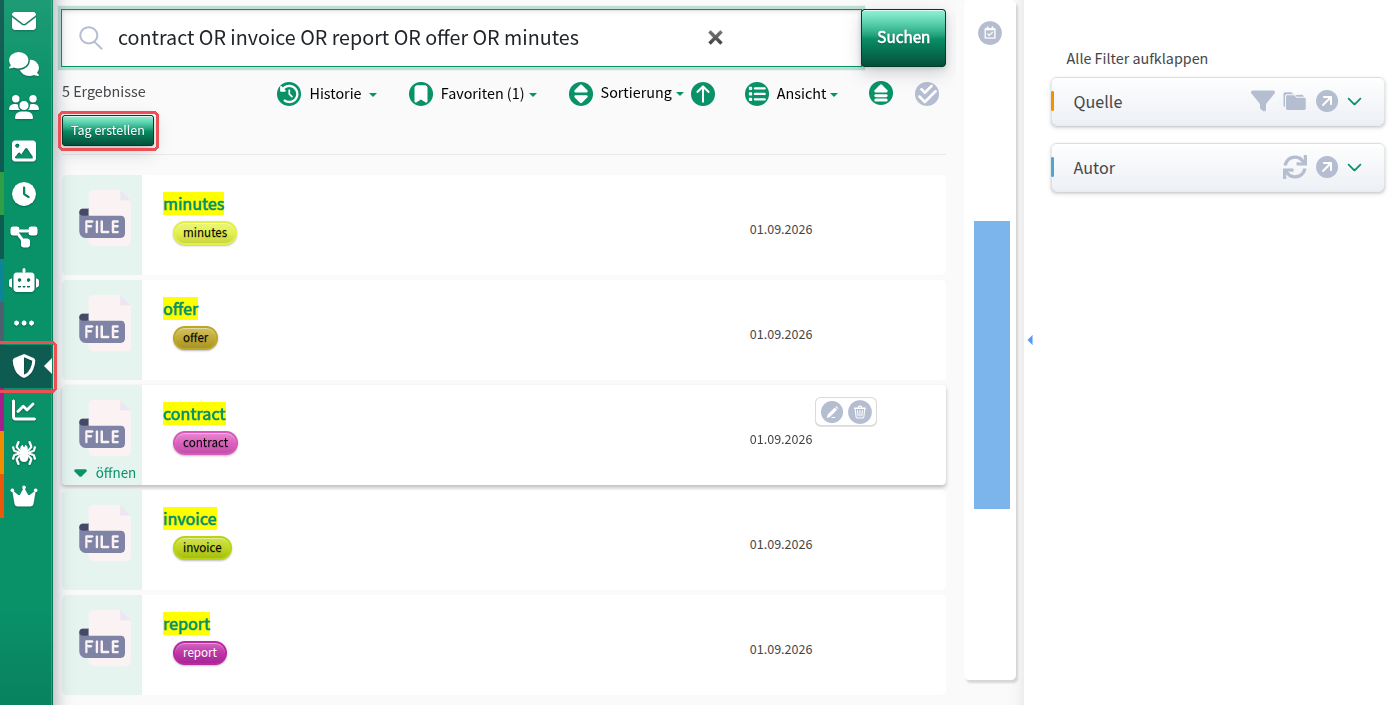
Using the icon  (it appears at the top right when you hover over a result, “Edit Tags”), you can add a tag to a file. This menu is also where you define whether the tag is visible only to the user who creates it (Private Tags) or to all users with access rights to the document in question (Public Tags), as well as the color in which the tag appears in the search results and the quick-tagging shortcut with which it can be assigned quickly and easily. Tags can also be created with the “Create tag” button in the tag management, which you open from the menu on the left.
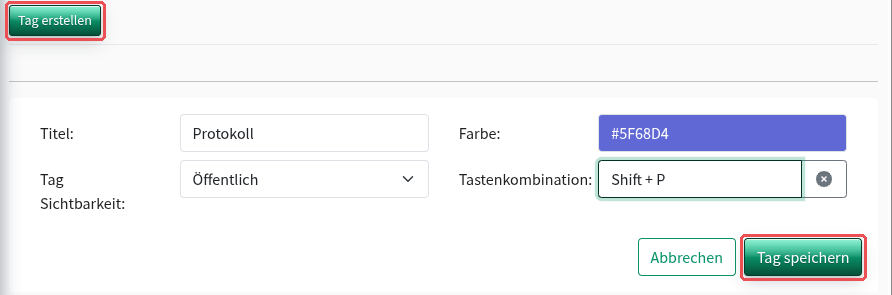
Switching between public and private tags
When creating tags, you can choose between private and public tags not only in the drop-down menu. The small icon button (see screenshots) also lets you switch conveniently between the two options. By default, the selection is set to public tags.


Recognizing tags
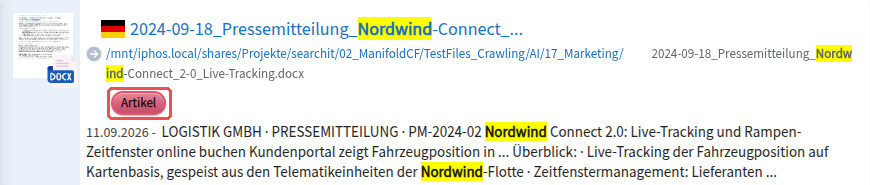
If a document has already been tagged, the tag appears in the chosen color below the file name and the path. Public tags can be recognized at a glance by their fill in the color you chose; private tags have an outline and label in the chosen color but are filled white.
Managing tags
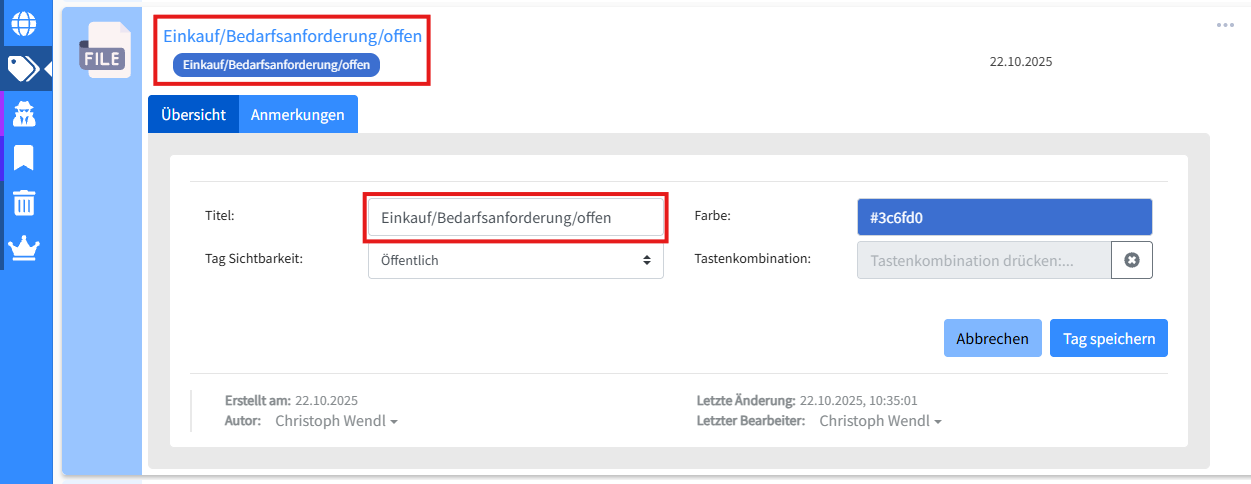
In the “Tags” module (in the module bar on the left, under the label icon  ) you can manage all existing private and public tags. You can only edit and delete tags that you created yourself. The tag’s metadata is also shown here.
Grouping tags
To structure your tags hierarchically, simply use the slash ( / ) as a separator between the levels, e.g. IT-Service/Presse/Tipps.
When you open the tag filter, only the top level is shown at first. Double-clicking a tag that has a substructure opens the next level, so you can move step by step through your tag hierarchy.
This keeps even extensive tag collections clear and easy to navigate.
Tip:
Grouping is especially useful when you want to sort many similar documents, for example:
- by year: Invoices/2023, Invoices/2024
- by department: Personnel/Applications, Personnel/Employee reviews
- by project and status: Project XY/Draft, Project XY/Approved
This lets you map specific workflows and keep track even in large archives.
Filtering by tags
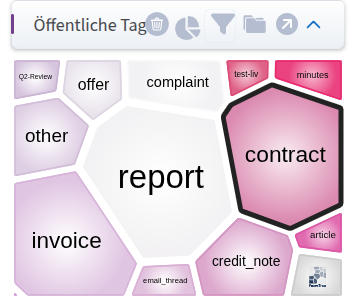
The graphical search filters let you filter by the assigned tags with one click. Double-clicking takes you deeper into the tag hierarchy. This way you can also reach the tags that were placed under a main tag with a “/”.
Excluding tags
You can also filter tags via the search bar by putting a minus sign “-” in front of the field name:-alle.tag.öffentlich:Tagname
and-alle.tag.privat:Tagname
What is quick tagging in searchit?
Quick tagging lets you assign tags quickly and efficiently without having to reach for the mouse every time. Each user can define the keyboard shortcuts individually.
Important notes:
- For each user, a keyboard shortcut can be assigned to only one tag, whether public or private.
- If the combination is already assigned, searchit asks whether the existing assignment should be overwritten.
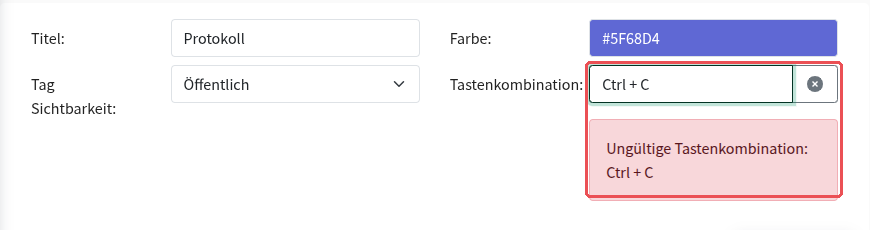
- Ctrl combinations (e.g. Ctrl+S) are not allowed, because they are either reserved by the browser or used internally by searchit.
- The function is only available for activated or selected entries (Active Mode).
- On macOS, the quick-tagging keyboard shortcuts are currently not available.
Defining quick tags
Quick tags can be defined or edited either right when you create a new tag or later in the “Manage tags” area of the user interface.
Example:
You specify that Shift+p automatically assigns the tag “Protokoll”: click in the “Keyboard Shortcut” field and press the desired combination.
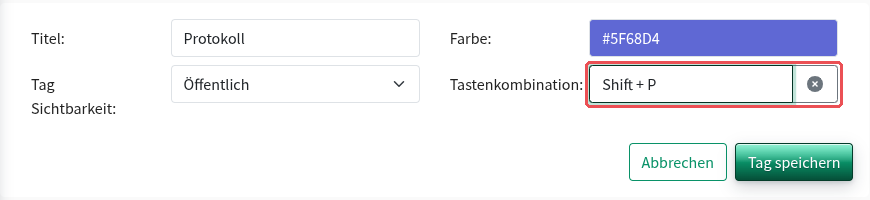
When you save, the system checks whether the chosen keyboard shortcut has already been assigned or conflicts with internal system commands. An invalid combination is reported immediately:
Assigning quick tags
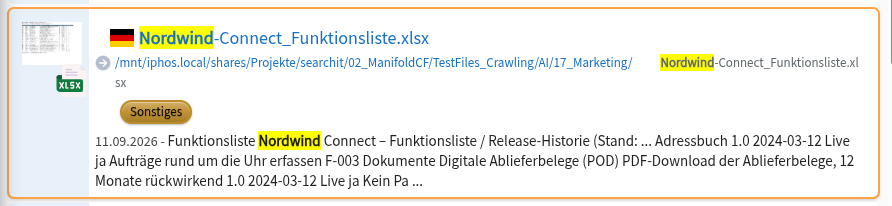
As soon as you are in Active Mode (see below), pressing the defined combination is enough to set a tag, provided the desired search result is actively selected (look for the orange frame).
Example:
You press Shift+p → the active result immediately receives the corresponding tag.
Read here how you can save time with the searchit bulk operations
Last updated on 21 September 2026