
Bulk operations
The screenshots show the German user interface.
The bulk operations in searchit save you time, especially when you work with large amounts of data.
Bulk operations in tag handling
Bulk operations let you edit several documents in searchit at the same time. Instead of opening or selecting individual files manually, you can use this function to apply an action, such as assigning or removing tags, to a large number of results with just a few clicks. Bulk assignment of tags can also be combined with the grouping of tags described there, to structure large amounts of data quickly and map workflows.
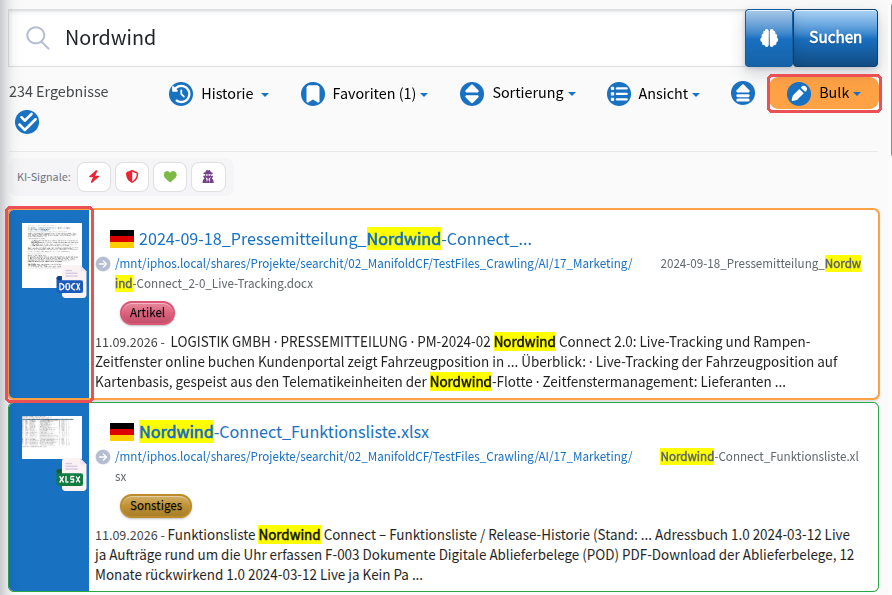
To do so, first select at least one search result to activate the “Bulk” menu item, then choose one of the available options. The individual steps are described in detail below.
Bulk assignment of tags
Preparing the bulk assignment
- Search for relevant documents
Start your search as usual and narrow down the results if necessary using the filters in the right sidebar (e.g. file type, language or source). Select at least one entry to activate the menu item for the bulk actions. - Start the bulk action
Click the Bulk menu (icon: pen in a circle, labeled “Bulk”) and choose the entry “Tags Assign”.
Selecting results for the bulk assignment
- You have several options:
– Click the “Select all results” checkmark at the top right to select all results.
– Select individual documents specifically with a mouse click. By holding down the Ctrl key, you can select or deselect several results, as in Explorer. With the Shift key plus a mouse click, you can select a continuous range of search results.
– You can also select entries with keyboard shortcuts: use the up and down arrow keys to navigate through the search results. Press Ctrl + Space to select an entry. - Selected results are marked in blue on the left.

Selecting or creating a tag
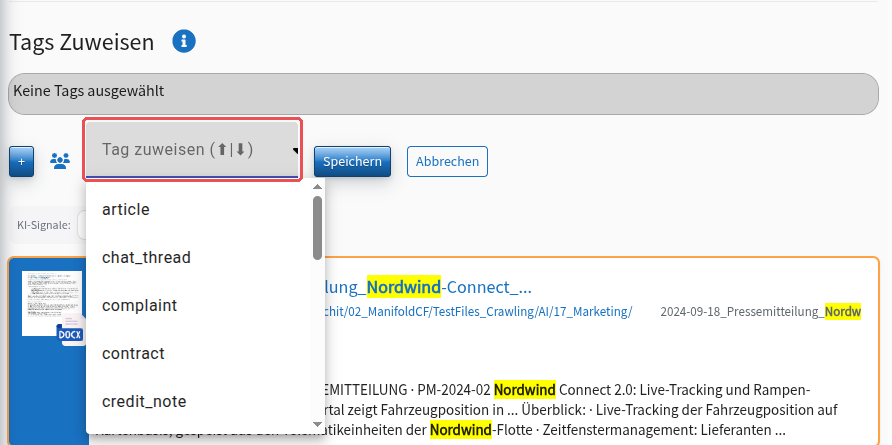
The drop-down menu shows a list of all available tags.
- Select an existing tag, or
- create a new tag if no suitable one exists yet.
Saving the assignment
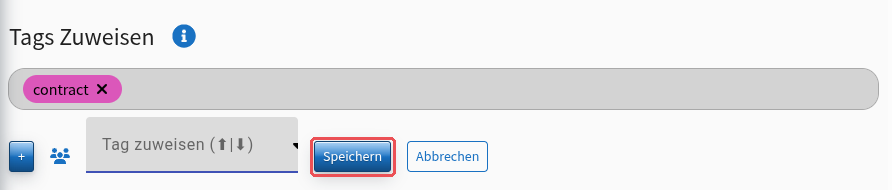
Click “Save” to complete the assignment.
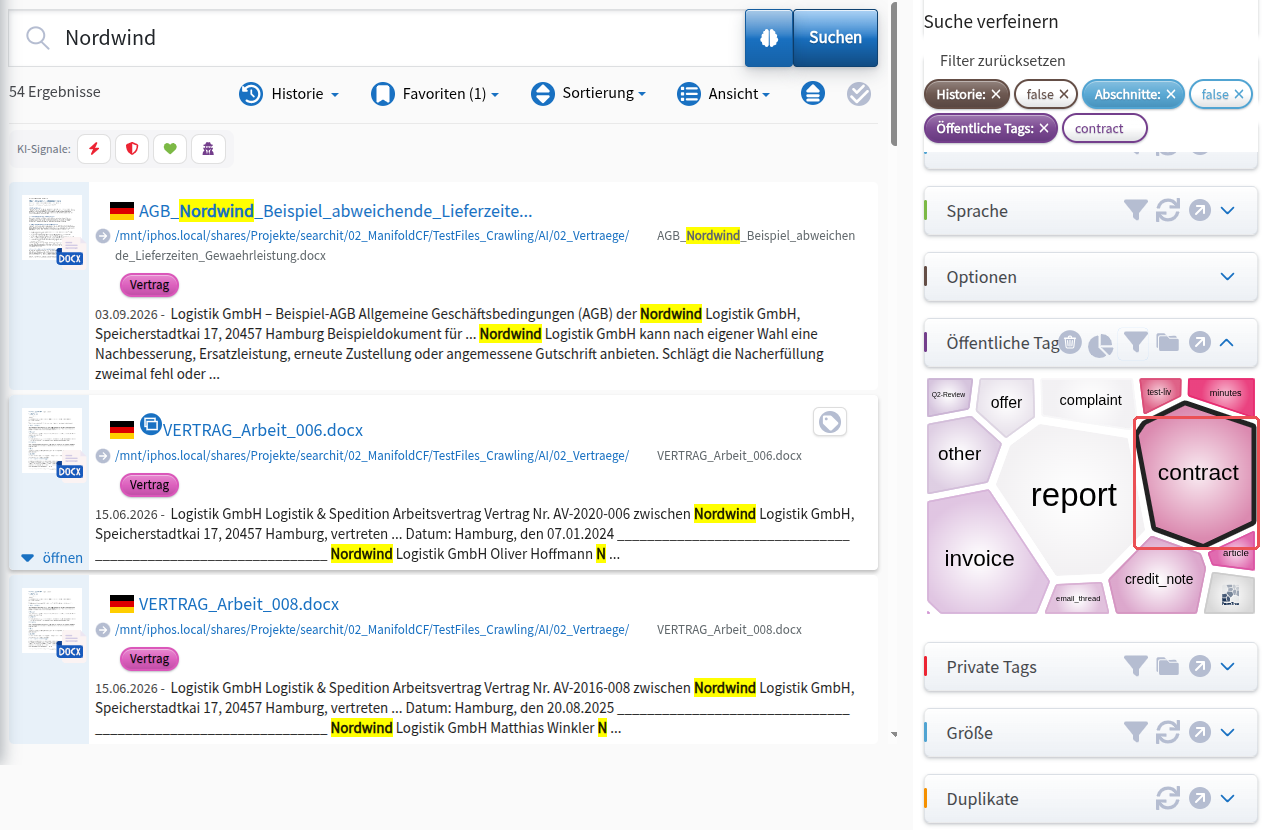
Select your assigned tag in the filters to refresh the page and display the newly assigned results.
Removing tags in bulk
With the bulk function “Tags Unassign” you can remove one or more tags from a selection of documents at the same time. This function lets you quickly correct incorrect tagging or clean up tags that are no longer current.
- Click “Bulk” (pen in a circle) in the top menu again and this time choose “Tags Unassign”.
- Select the results from which one or more tags are to be removed.
- At the top of the “Tags Unassign” area you see all tags currently assigned to the selected documents. Click a tag to move it to the removal row. If you picked the wrong one, one click moves it back to the row with the tags assigned to your selection.
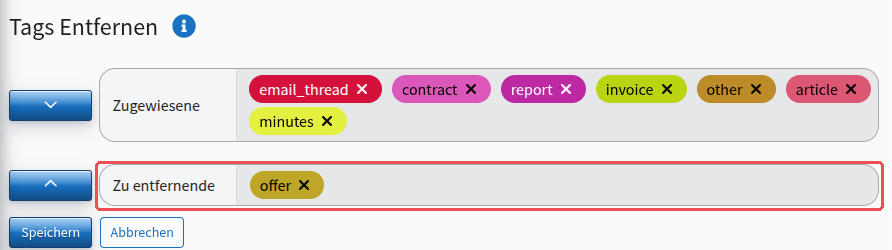
With the arrow buttons to the left of the two rows, you can select all tags shown for the results for removal at once, or deselect them again.
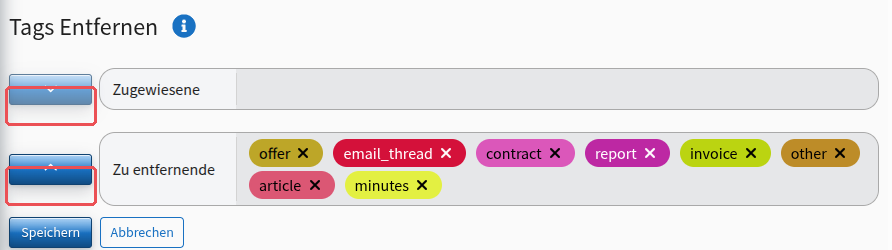
Check everything and click “Save” to remove the selected tags from all selected documents.
Clicking the corresponding tag filter again loads the new status of the tags.
Bulk editing of assigned tags
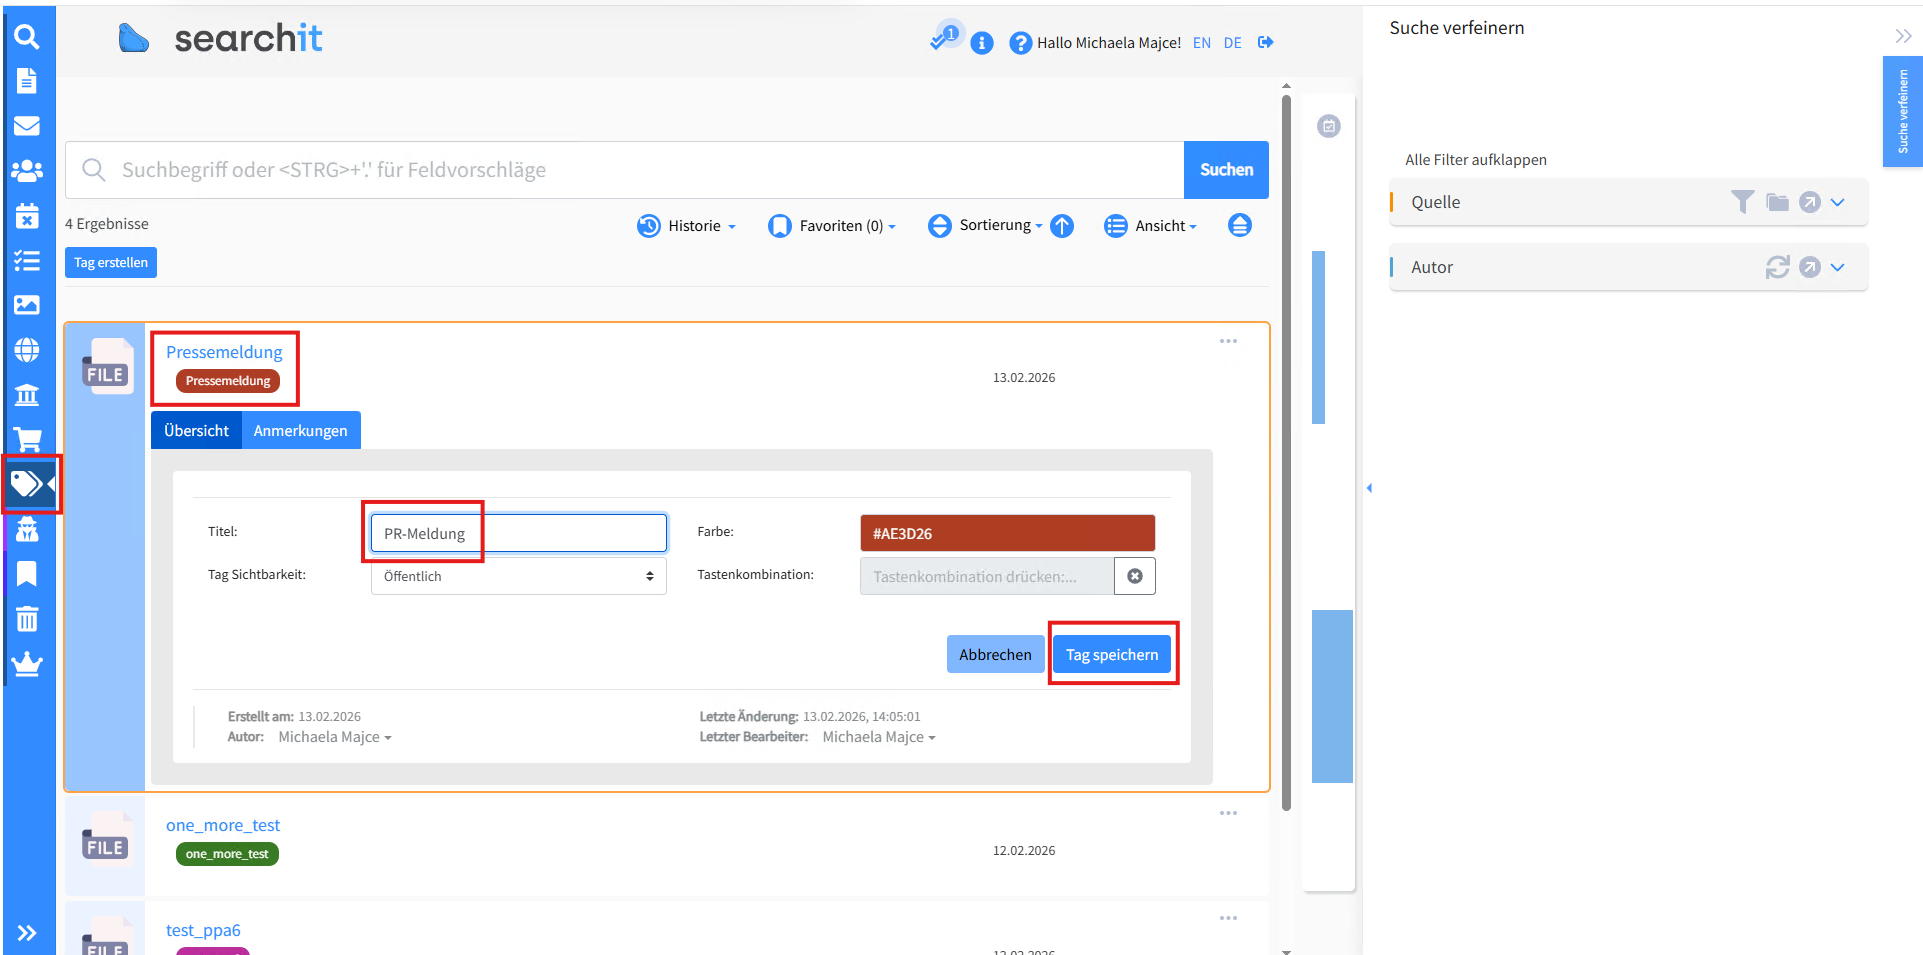
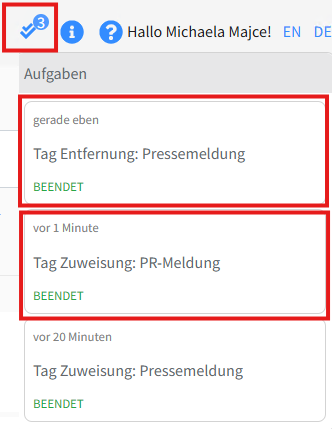
Changes to a tag that you edit directly in the tag overview now automatically apply to all assigned documents: the new tag is added and the edited tag is removed, without any manual rework.
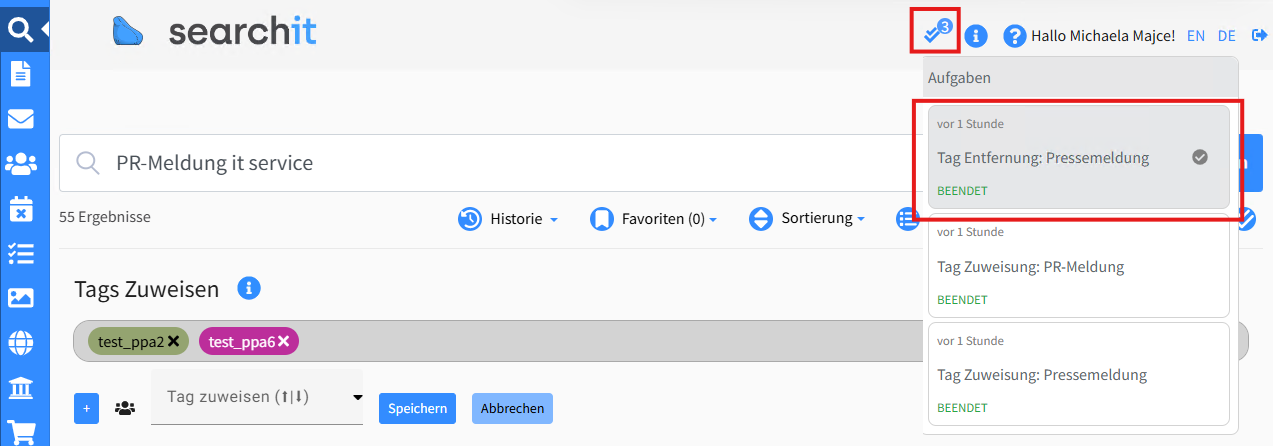
In addition, the task overview gives you a detailed view of all bulk operations performed. You can see at a glance which tasks have been completed, what exactly was changed and which actions are still in progress.
Bulk - Export as CSV
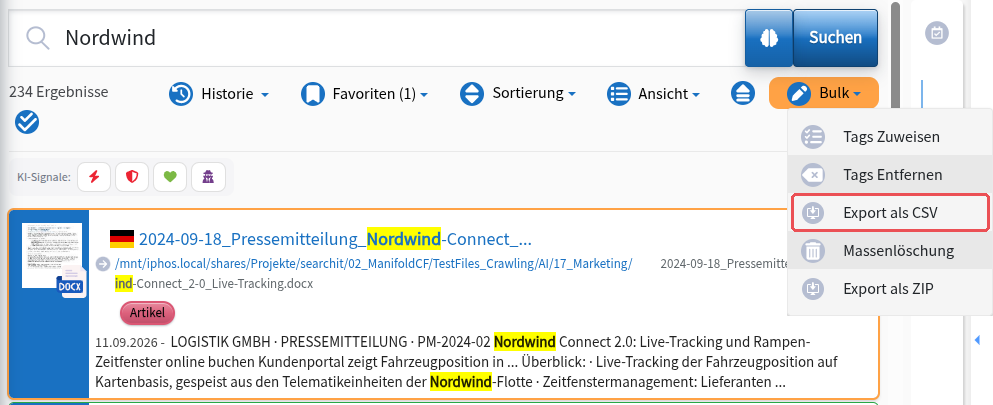
With the bulk operation “Export as CSV” you can export several search results at the same time as a CSV file. The function is available in the Bulk menu of the result list.
First select the search results you want from your result list or use the one-click option to select all results of the current search. Then open the Bulk menu and choose the entry “Export as CSV”.
The CSV export is especially useful for further processing of result lists outside searchit, for example for analyses or documentation purposes. The exported file contains the relevant information on the selected search results in tabular form.
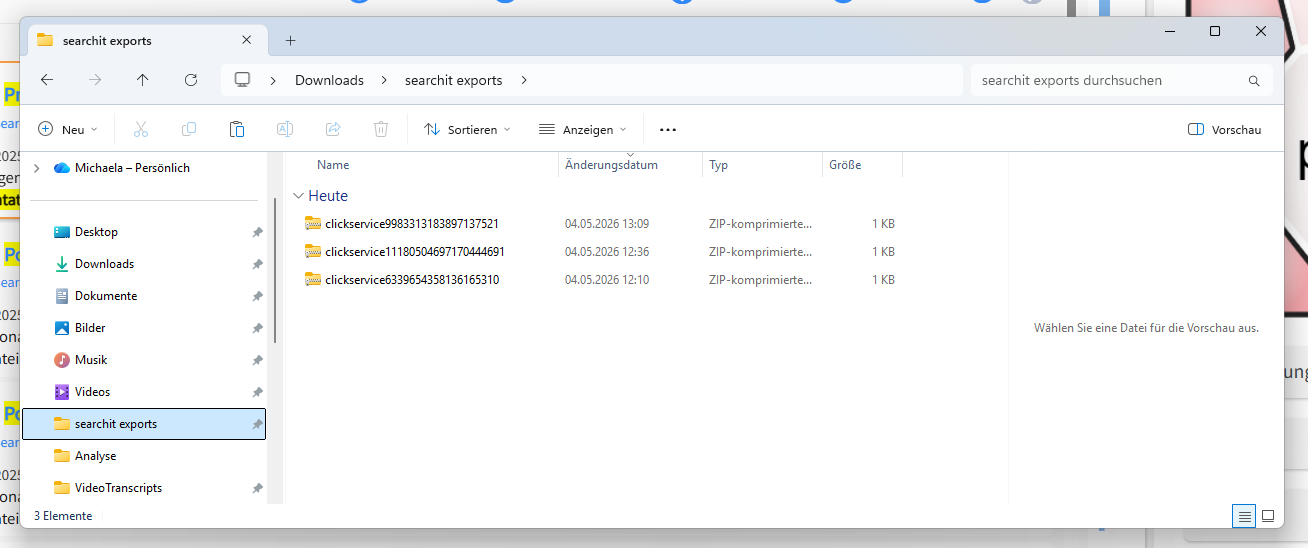
Bulk - Export as ZIP file
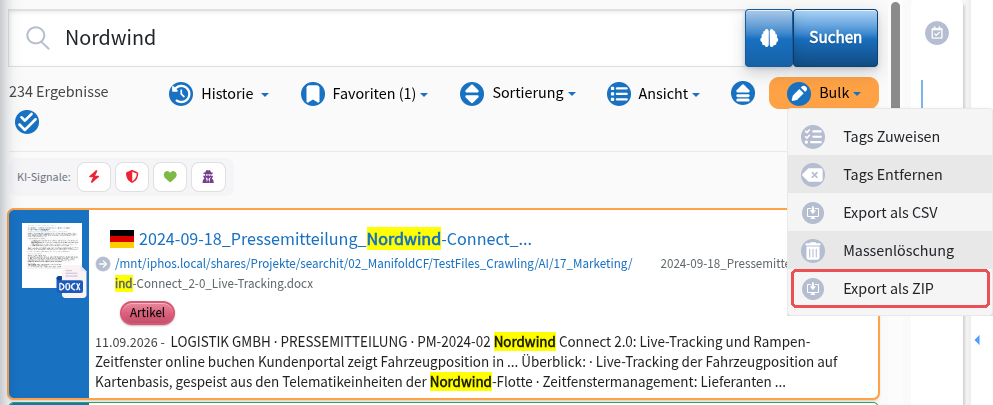
With the bulk operation “Export as ZIP” you can export several selected search results at the same time as a ZIP file. The function is available in the Bulk menu of the result list and requires an installed Click-Service.
First select the results you want from your result list or use the function for all results of the current search. Then open the Bulk menu and choose the entry “Export as ZIP”.
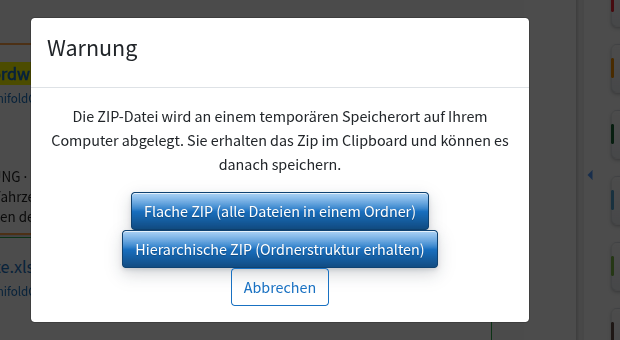
A dialog then appears in which you can choose how the ZIP file is to be created:
- Flat ZIP: all files are saved together in one folder.
- Hierarchical ZIP: the original folder structure of the files is preserved. Useful if you want to keep the folder structure of large exports at the place they are copied to.
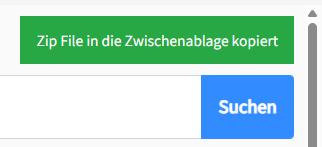
After your choice, the ZIP file is stored in a temporary location on your computer and copied to the clipboard. A green success message appears when your ZIP file is ready to be pasted.
You can then paste the ZIP file at the desired location either by right-clicking and choosing “Paste” or with the key combination “Ctrl + v”.
Bulk - Requesting bulk deletion
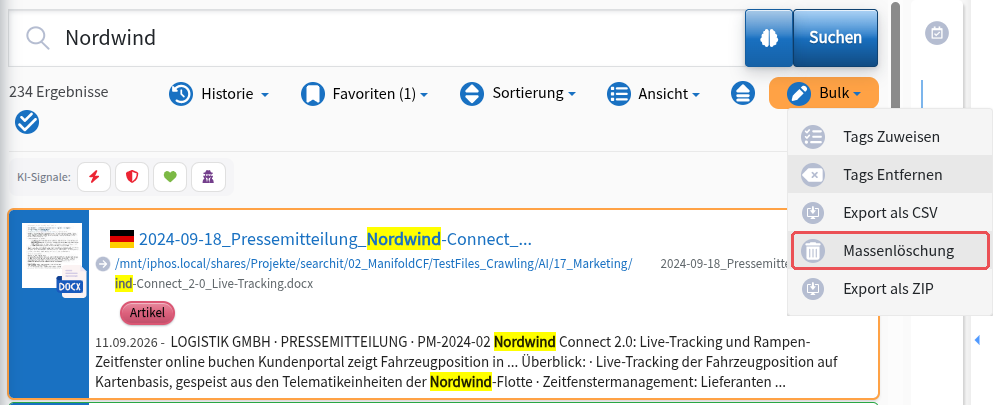
With the bulk operation “Bulk delete” you can request the deletion of several search results at the same time. The function is available in the Bulk menu of the result list.
First select the results you want or use the function for all results of the current search. Then open the Bulk menu and choose the entry “Bulk delete”.
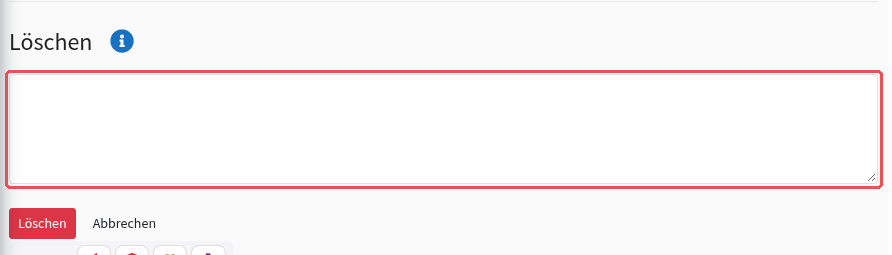
An input field for the deletion request then appears. Enter a short justification or additional notes here so that the request can be reviewed and processed in a traceable way.
Clicking “Delete” submits the request for the selected results. The selected documents are not removed immediately; instead, the deletion is requested from the person responsible in your organization. With “Cancel” you can end the process without sending a deletion request.
Checking the bulk status
Check the status of your bulk assignment here:
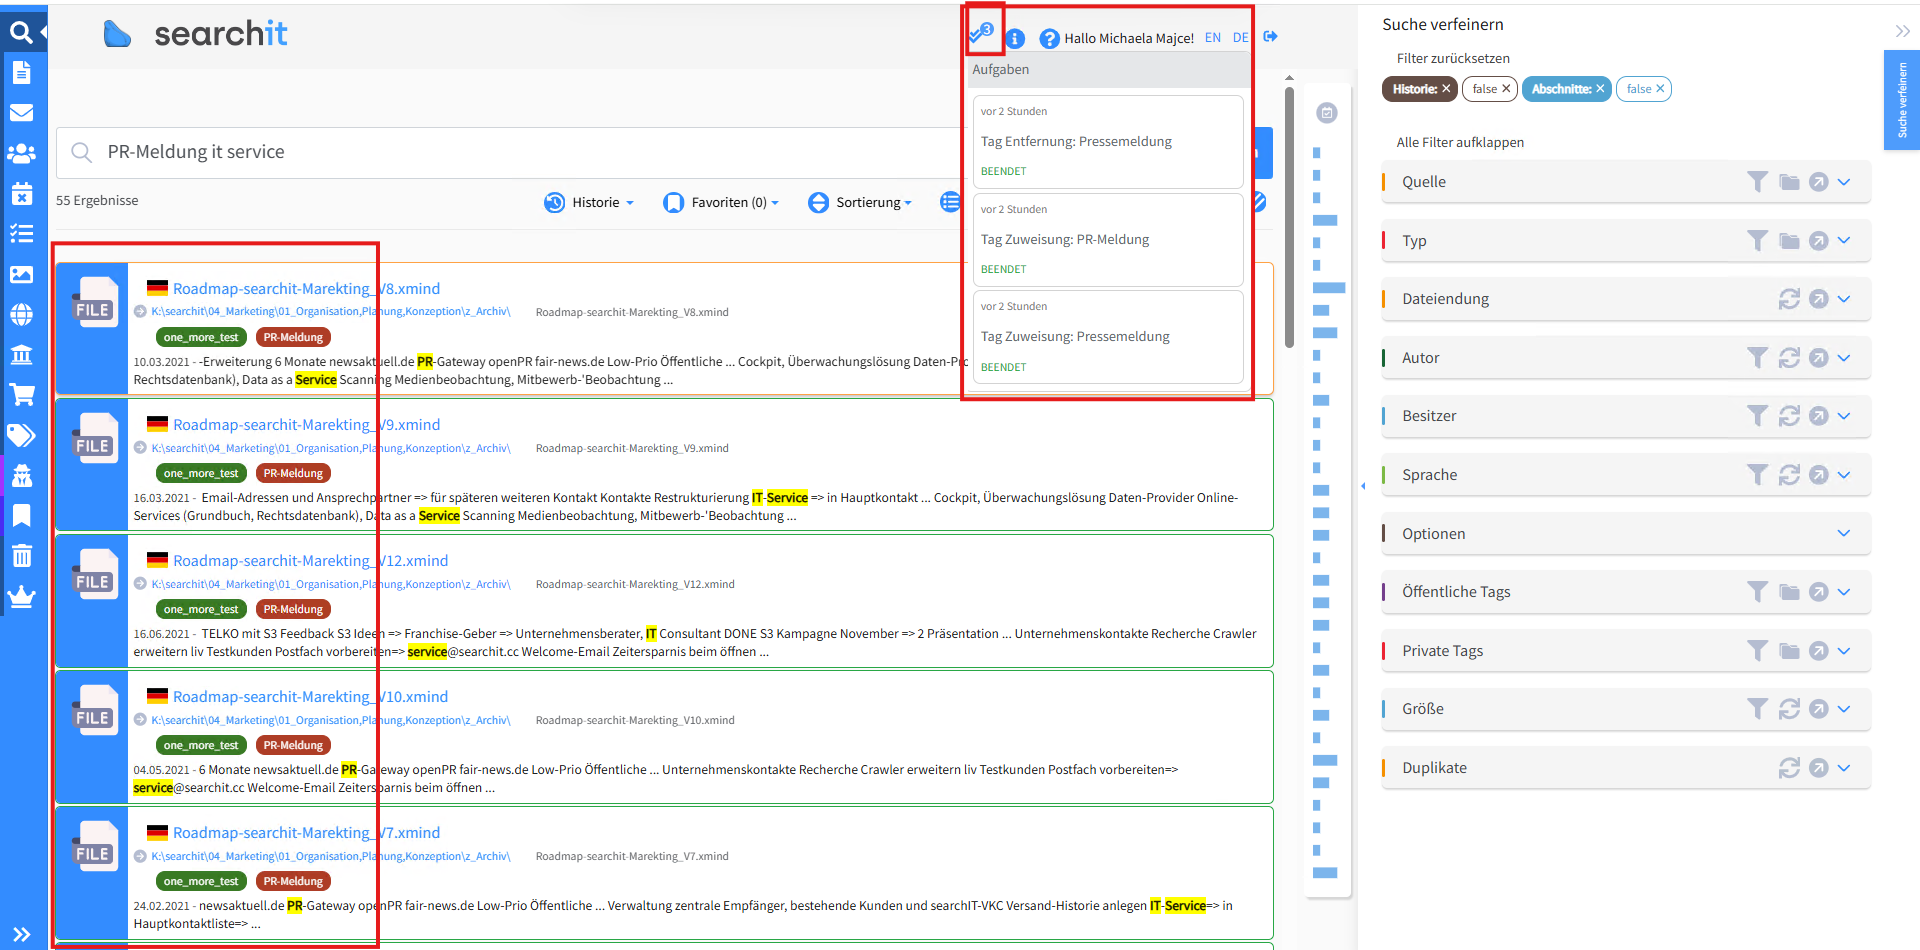
After checking, you can delete status messages for your completed tasks simply by clicking the checkmark next to the job shown.
Last updated on 21.09.2026